 I wrapped up the monitor stand project last weekend. The finishing touches proved to be the toughest part - mainly the finishing! I was using good, furniture grade ply but not stain grade (Birch or Ash) I think. Nice and smooth but not really for a wood grain finish. So, I had planned on a black, glossy finish - somewhat like the phone holder I made a while back. I didn't want to get too involved with the painting so I set out to use black spray paint. I did get the good stuff, but even that proved a little difficult to work with.
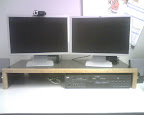
The first coat was badly 'fisheyed' - marked up with little blemishs that look like little circles where the paint didn't go on. It's caused by surface impurities. My professional finisher friend, gave me some advice though that I'm sure that I'll use in the future! Prep normally by sanding and wiping/blowing off dust, but then wipe the surface down right before you paint with mineral spirits (paint thinner)! Then, put down a couple of light coats just a few minutes apart. 2-3 coats with cover pretty well and is all you want to do in one 'session'. Let that dry for a day, sand very lightly wth 200 grit paper (or so) and repeat it - wipe down and spray. The mineral spirits remove the impurities from the surface and help the paint droplets to flow together. This also reduces the "orange peel" effect that you can get. The pic above it the finished product in place. Here are a couple more 'almost done' pics:
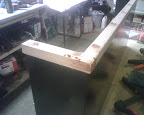
After nailing the face frame on (red oak scraps, milled to 1"x3/4") the holes are puttied and later sanded.
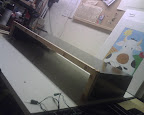
I had to 'test' it on the table top -really, I was just dying to see it like it would on a desk. I like!
No comments:
Post a Comment